

A Magical Peacock Tutu Dress Tutorial
Posted by Guest Blogger Nicole Weldon of The Local Hummingbird on Feb 8th 2017
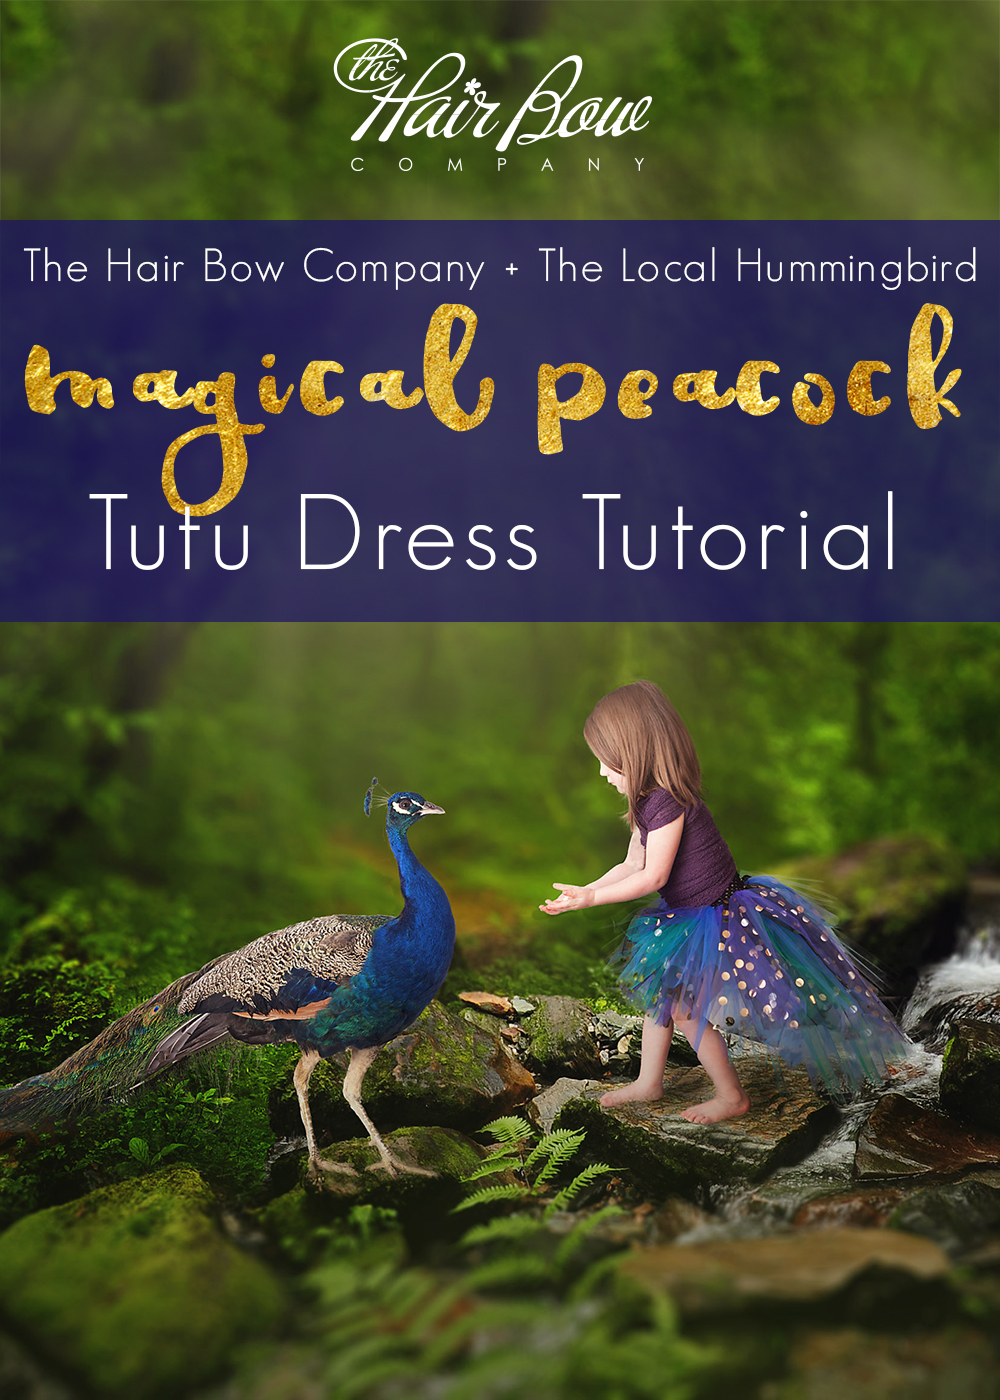
We are excited to partner with tutu maker Nicole Weldon from The Local Hummingbird for this tutorial! We would also like to thank Shawna Pearce Photography for the beautiful photos that brought this project to life! When Nicole suggested a "peacock theme" for our first collaboration, we knew it would be beautiful since we have created peacock inspired dresses before. (Check out one of our other peacock dresses here.) When we saw this one though, we were totally blown away! Magical is the only way to describe it. We couldn't imagine a more perfect peacock now and our new gold dot tulle turned out to be the perfect detail for a fabulous peacock.
All supplies are from The Hair Bow Company and all crafting expertise is courtesy of The Local Hummingbird.
Materials:
1 unlined 8" crochet tutu top in Black
Tulle:
Teal
Deep Purple
Kelly Green
Royal Blue
Gold Dot Tulle in Black
Cutting Your Tulle Strips
You will need different lengths of tulle for each different layer of the skirt. As with most of our tutu dress tutorials, each tulle strip will be folded in half, so the strips will need to be double the length you want for the final skirt. (The shortest layer of the skirt is 9" so you would cute your strips for that layer 18")
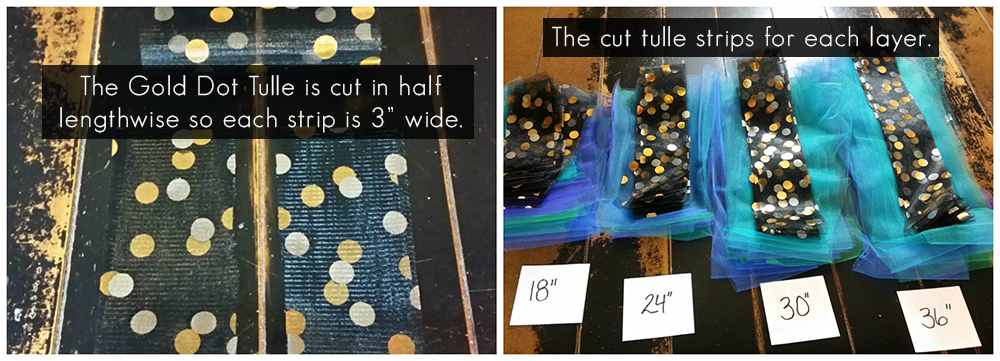
Final Skirt Layers:
The 4 skirt layers are 9", 12", 15", and 18"
Cut Your Tulle to these Lengths:
You will need to cut the strips for these layers to 18", 24", 30" and 36"
Take your Gold Dot Tulle in Black and fold the strips in half and cut lengthwise. (This will give you strips that are 3" wide instead of the original 6" wide).
Creating the skirt:
1. Face seam of crochet top down with front facing towards you.
2. Using the 18" strips fold in half weaving every other square along the bottom row.
3. Once bottom row is completed (without spilling over to the sides focus on just the very front that's facing you on the top). Skip the next horizontal line and begin to weave again every other square (filling in between the weave below this is called a brick lay)
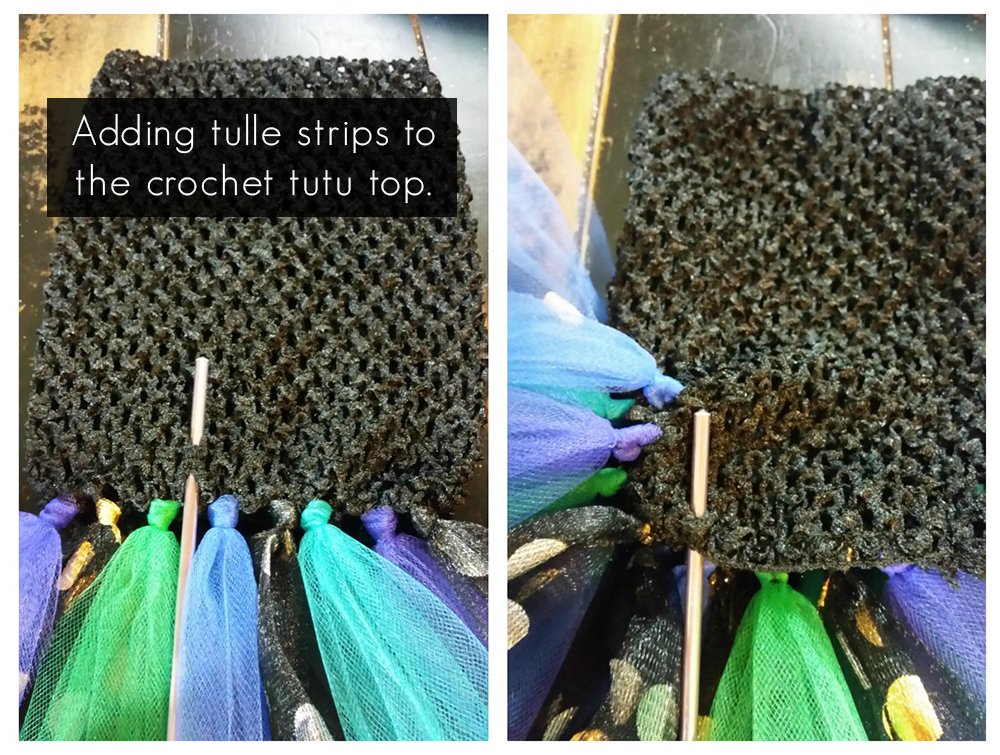
4. Do this for a total of 4 layers (again only filling the very front of the top). This now looks like half a tutu skirt.
5. Using 24" strips start going again at the very bottom weaving 2-3 strips to both right and left sides going up again 4 layers.
6. Take the 36" strips to fill the bottom two rows (brick weaving).
7. Take the 30" strips and brick weave the top 2 rows.
8. The finished skirt should appear short in front ascending to long towards the back. This skirt will also appear choppy and textured from all the different layers weaved in.

Styling the Final Product!
We used an unlined tutu top for this tutu dress. We find that unlined tops are easier to work with when you want to add a lot of layers, like we did in this skirt. You can always substitute a lined tutu top if you like more coverage, or layer another top, shirt, or fabric over the tutu top, like we did with our model for the photo session.
All supplies are available here at The Hair Bow Company
Crafting by The Local Hummingbird
Model Photography by Shawna Pearce Photography
All crafting process photos by The Local Hummingbird