

Sci-Fi Princess Costume | Inspired by the Supreme Commander of the Dark Side
Posted by The Hair Bow Co. with Cheryl W. on Sep 16th 2016

A few months back, one of our amazing customers, Cheryl, shared a photo of her daughter in her fantastic new tutu dress with us. We immediately knew that we just HAD to know how to make this ourselves, and because we love y'all so much, we wanted to be sure y'all had the inside scoop too! We asked Cheryl if she would be willing to help us out with this week's post, and lucky for us (and you!), she said yes. Read on to see how she made this super awesome tutu dress that would be perfect for trick or treating, the upcoming birthday party, or just because, as everyone knows, on Wednesdays we wear pink!
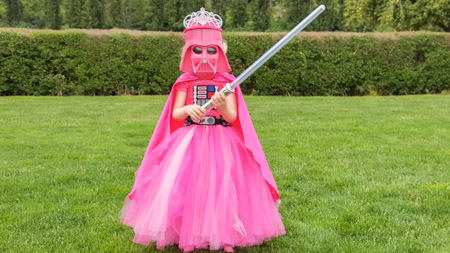
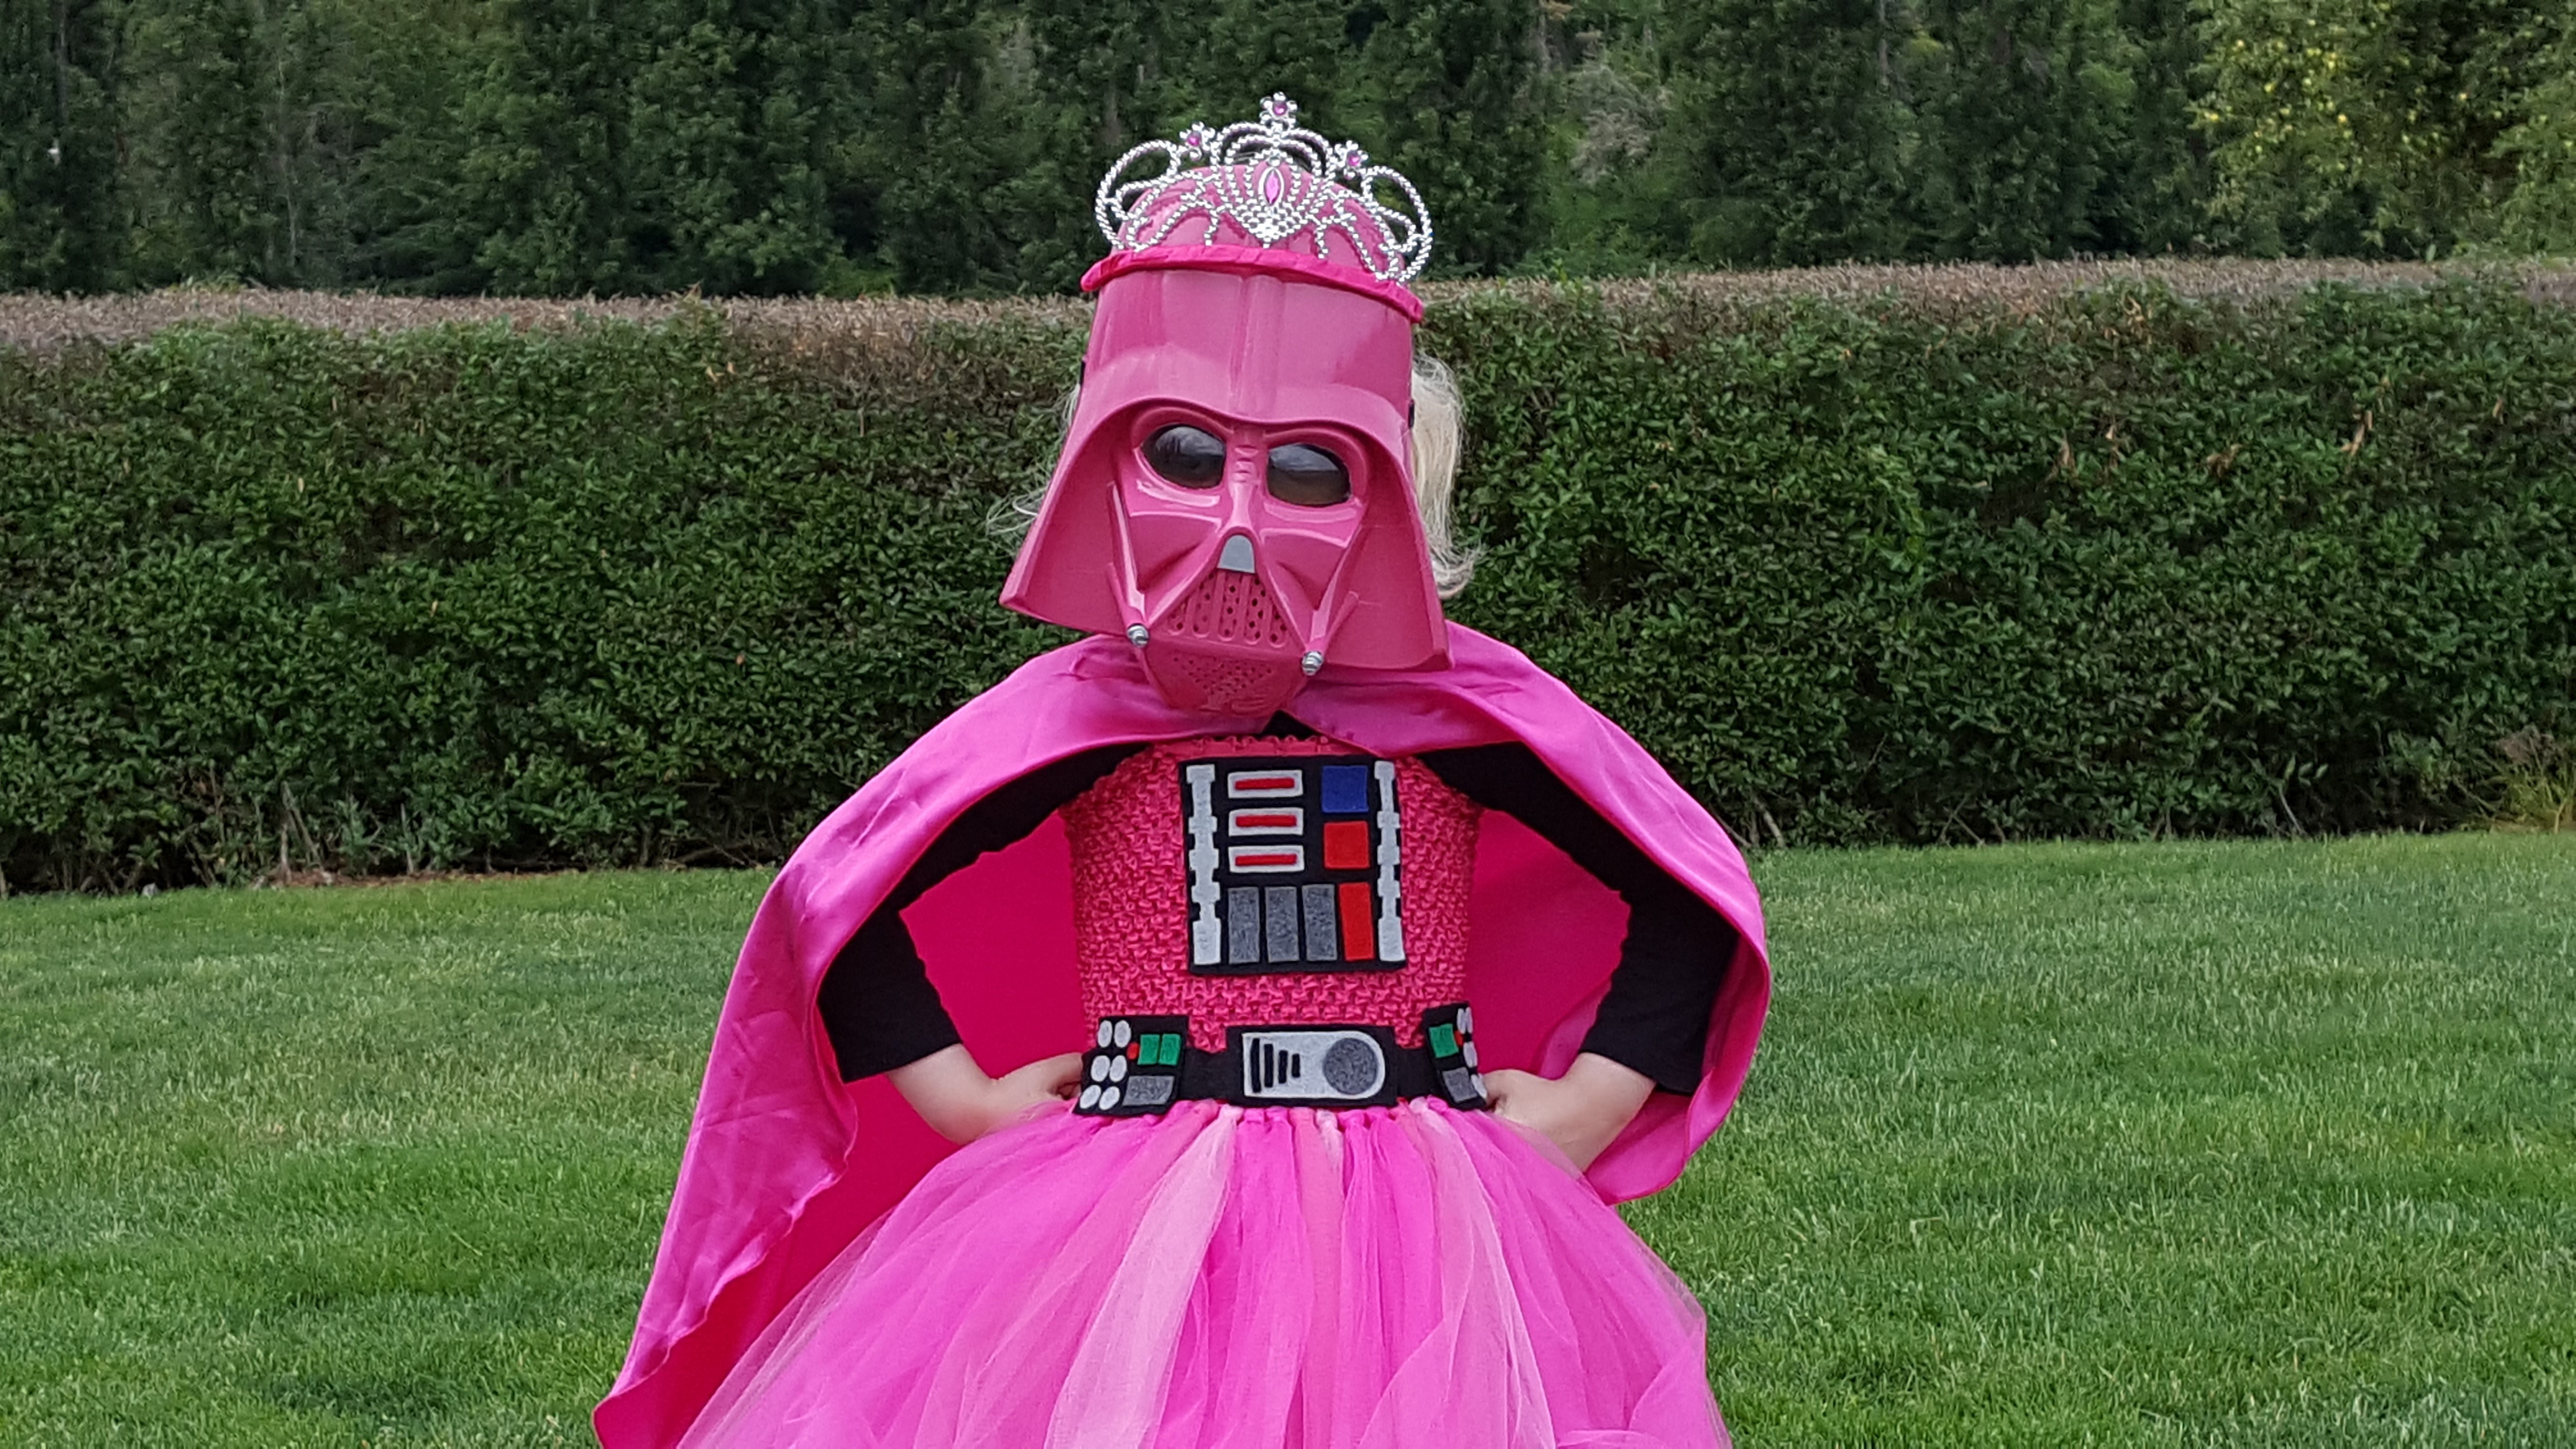
Who says Star Wars is only for boys or that girls can only dress like the girl characters? My daughter LOVES Star Wars and she loves the bad guys, but she also loves to dress up like a princess. I say why choose when you can have the best of both worlds?! Allow me to introduce you to Sci-Fi Princess!
This post is a bit lengthy, but stay with me here. I promise it's worth it!! Here are the supplies you'll need to make a tutu dress for your Sci-Fi Princess:
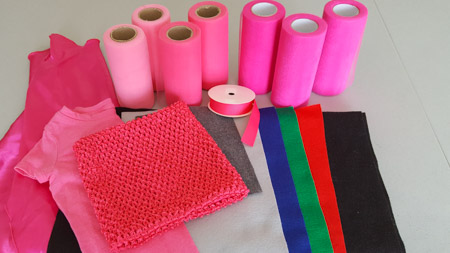
Tutu Dress
- 1 hot pink 8” lined tutu top (for most kids age 3-5 years)*
- 3 rolls shocking pink shimmer tulle
- 1 - 2 rolls AM beauty pink tulle (depending on the length of your skirt)
- 1 - 2 rolls Paris pink tulle (depending on the lenght of your skirt)
- 1 roll 7/8” shocking pink ribbon
- Felt – black, dark grey, light grey, red, green, blue (available through your local crafts shop)
- Optional – shirt to go under the tutu top
- Optional – cape
*Check out the other tutu top sizes to find one that will best fit your princess!
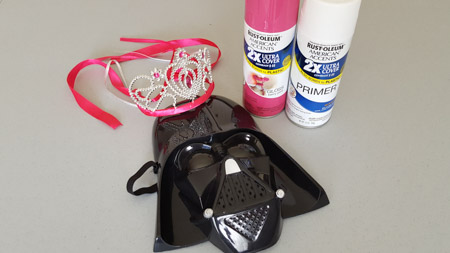
Mask
- Darth Vader mask
- Primer spray paint
- Pink spray paint
- Tiara
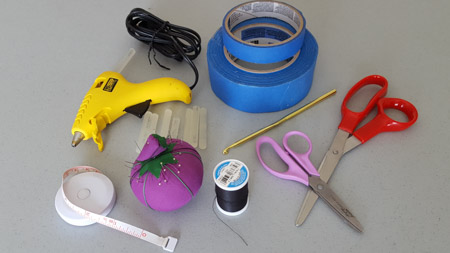
Miscellaneous supplies and tools
- A piece of sturdy cardboard that is just a smidge longer than the desired length of your skirt (collapsed mailing boxes are perfect for this!)
- Tape measure or ruler
- Scissors
- Crochet hook
- Hot glue gun and glue sticks
- Pins, needle, and black thread
- Painter’s tape
- Extra cardboard for spray painting (not pictured)
The Hair Bow Company's blog has posted how to make a basic tutu dress many times, and I definitely used their wonderful tricks. I always like to see everything in one place though, so here it is again!
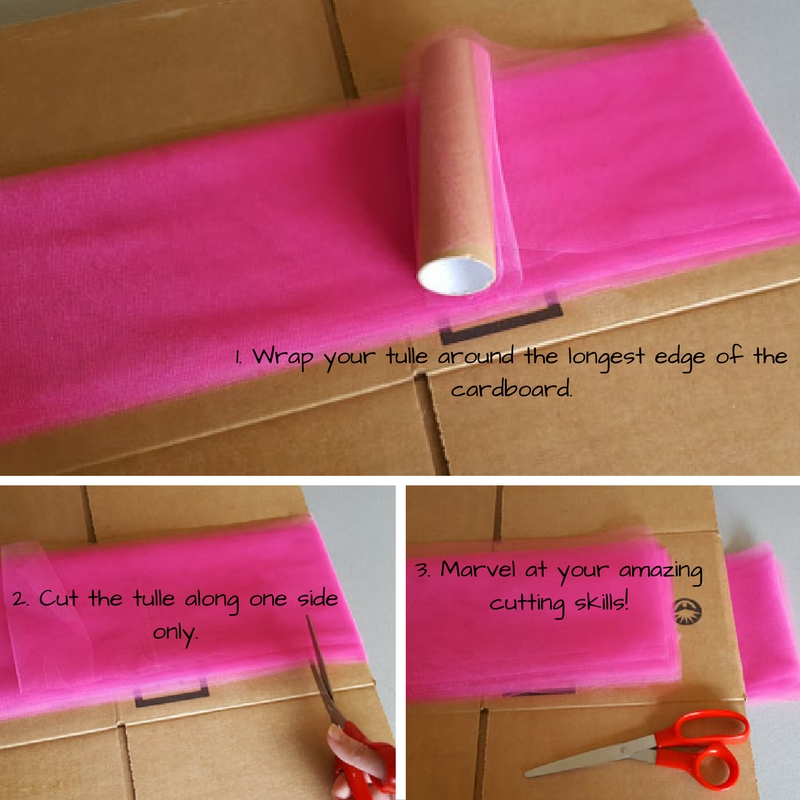
Start by determining how long you want your skirt to be and cut pieces of tulle that are twice that long, since you will be folding them in half. The easiest way to cut the tulle is to wrap an entire roll of tulle around a flattened cardboard box that is the same size as the length of the skirt and cut across all pieces of the tulle on one side only. Repeat this process for each roll of tulle you will be using. I wanted this dress to be full length on my daughter, and needed the skirt to be about 20” long. I needed pieces of tulle that were about 40” long for the 20" skirt. Note: my five year old daughter is tiny, so these measurements might make more sense for kiddos that are 3-4 years old.
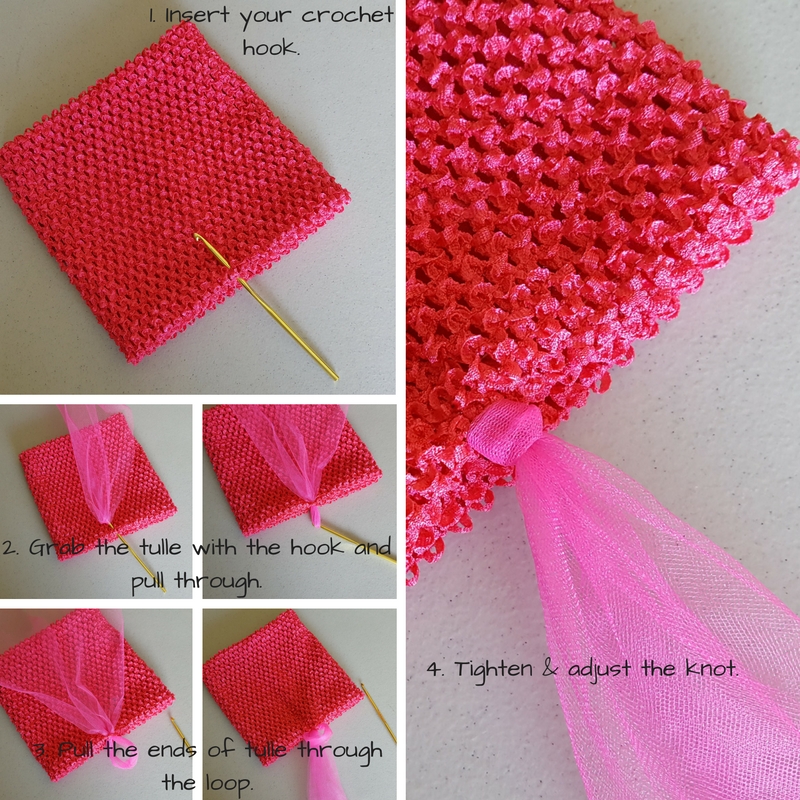
To add the tulle to the tutu top, you are going to insert a crochet hook behind a square that you want to wrap the tulle around (in the bottom hole and out the top hole). Next, fold your tulle strip in half and hook the middle of the tulle piece on the crochet hook. Pull the tulle through the tutu top. Now you have a loop of tulle sticking out of the tutu top. Grab the ends of the tulle and pull them through the loop. Tighten and adjust the tulle until you have a nice little knot, but not too tight.
Repeat this process all the way around tutu top. To add a second layer, repeat the same process a row up from the first row. Voila! This is the start of a basic tutu which you can embellish to your heart’s content.
48 pieces of tulle should fit nicely around the 8” tutu top. I did two layers of the following pattern: shimmer shocking pink, shimmer shocking pink, AM Beauty (hot pink), Paris Pink. I used a total of 48 pieces of shimmer shocking pink, 24 AM beauty pink, and 24 Paris pink. Each roll of tulle will make about 21 pieces that are 40” (900” ÷ 40” = 22.5, sometimes the rolls are slightly shorter than advertised or have a blemish you need to work around, so be sure to have a little extra just in case).
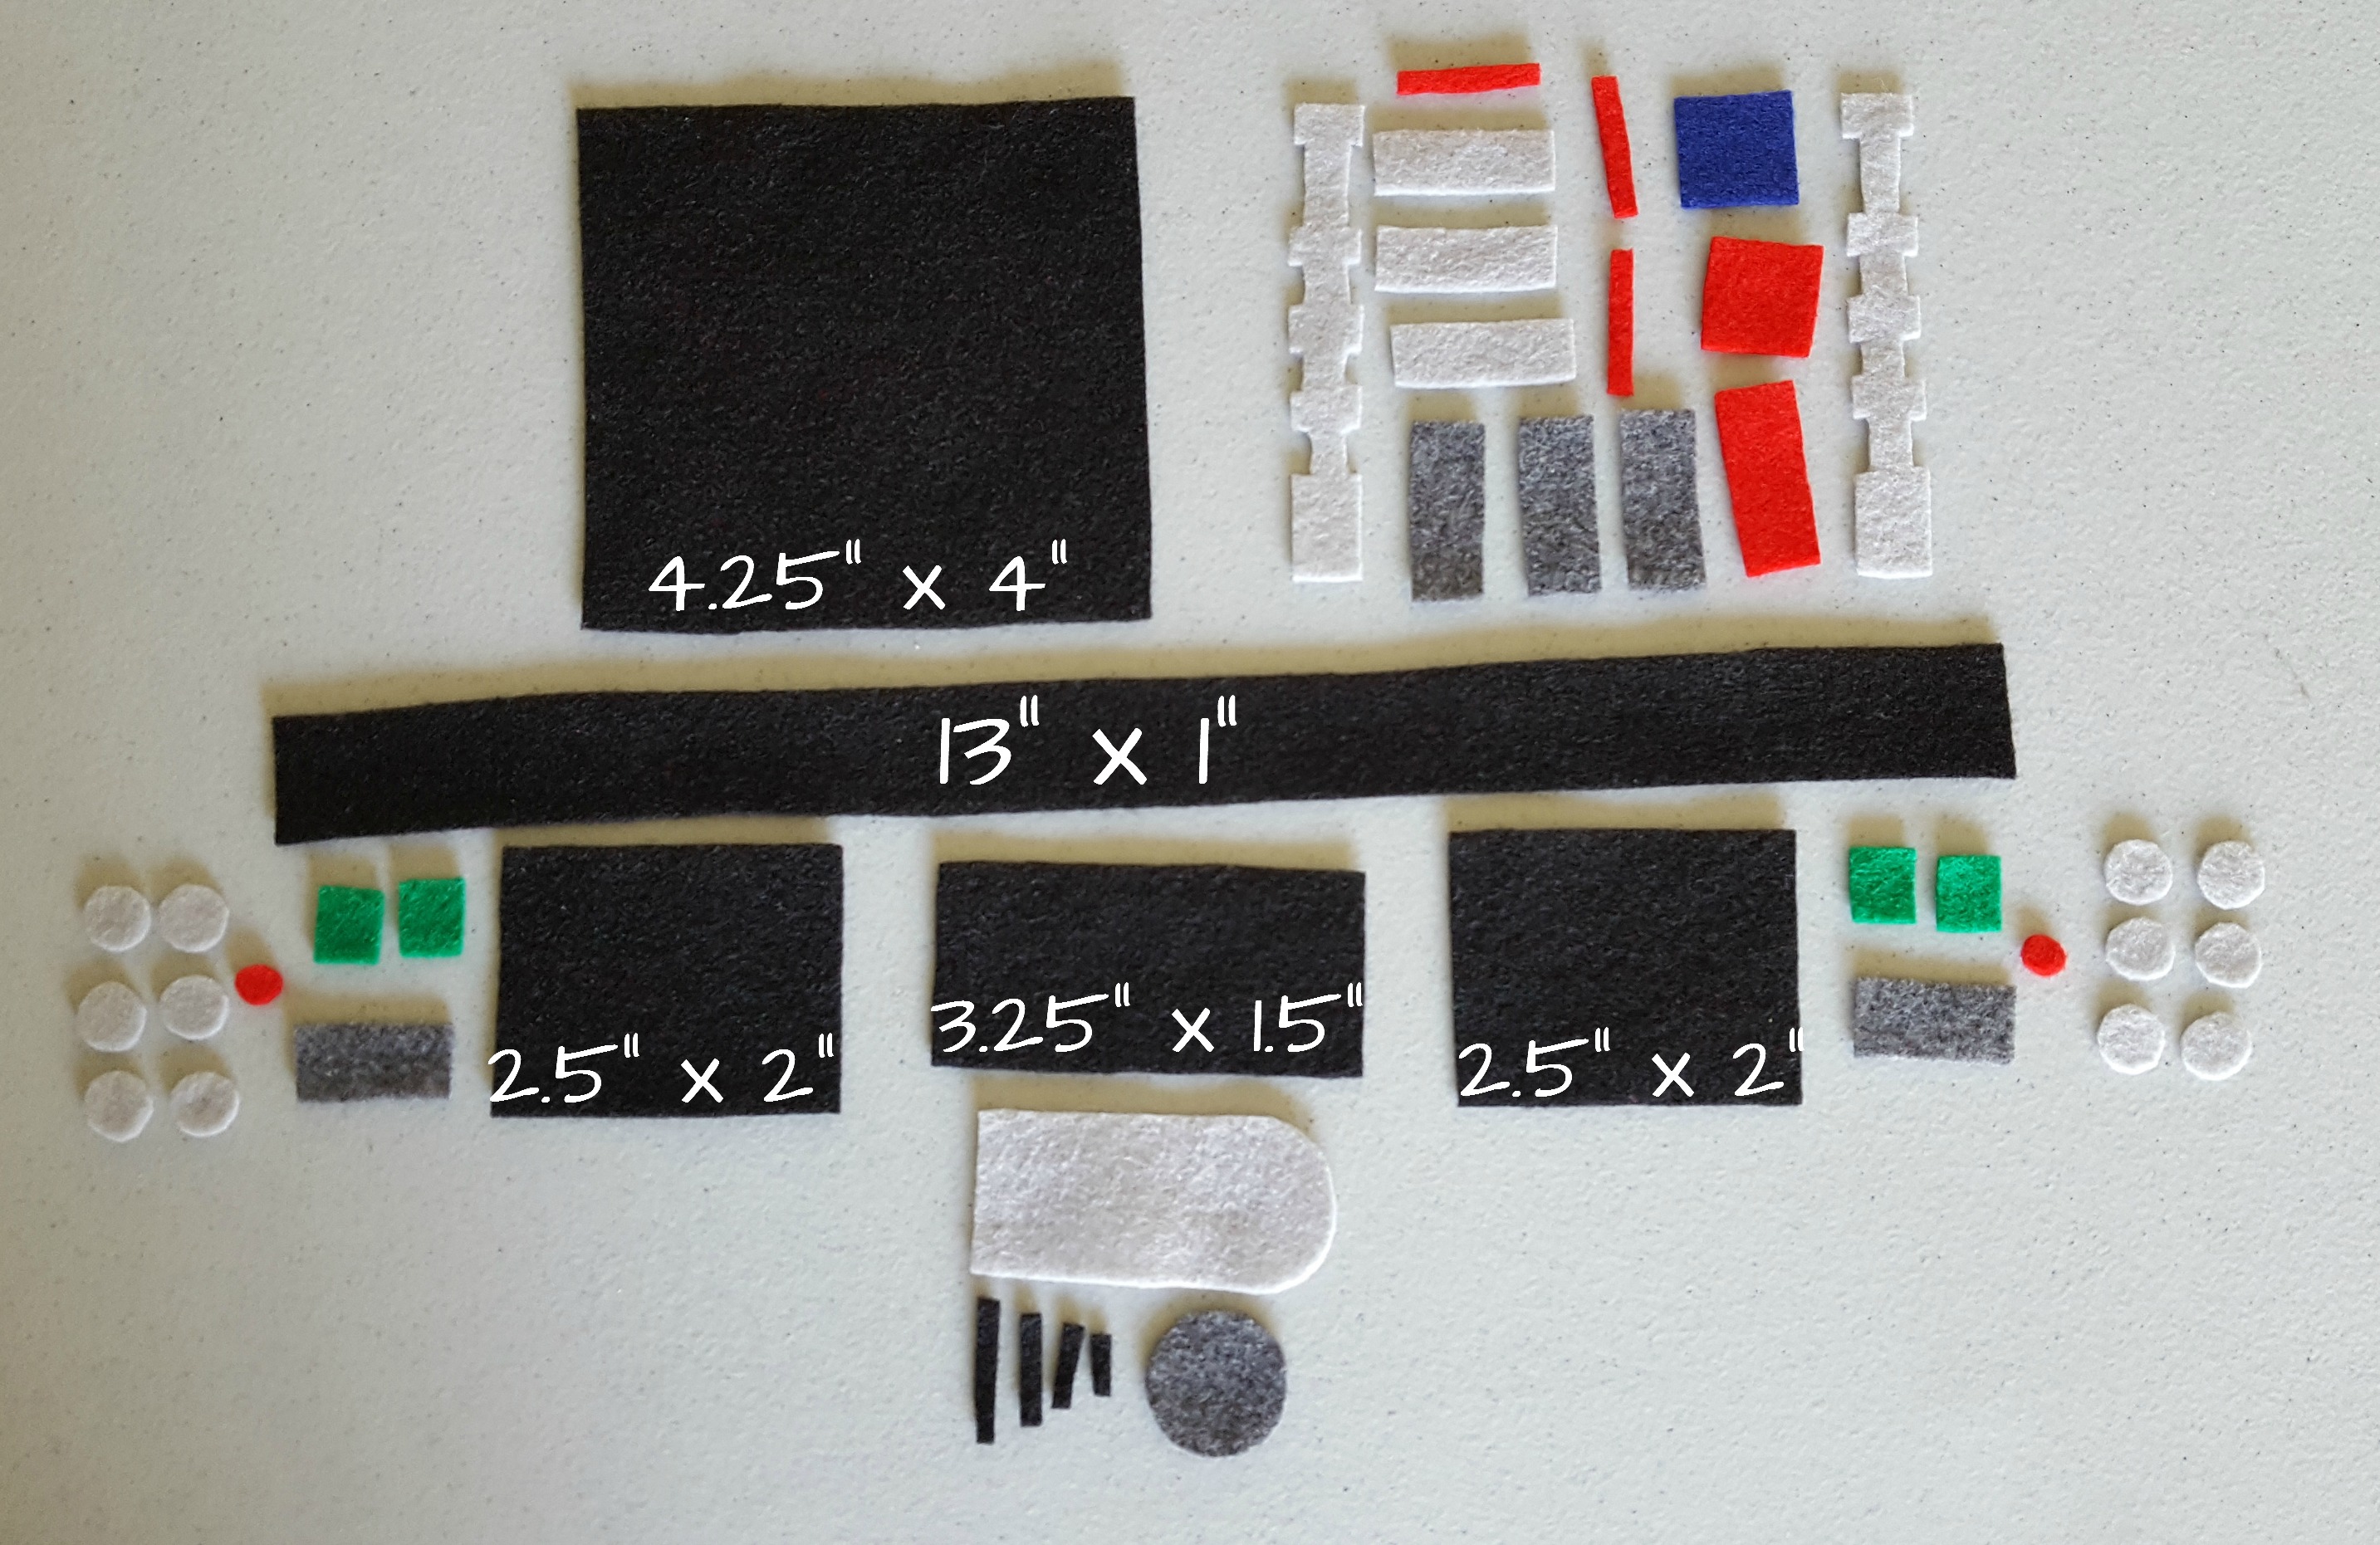
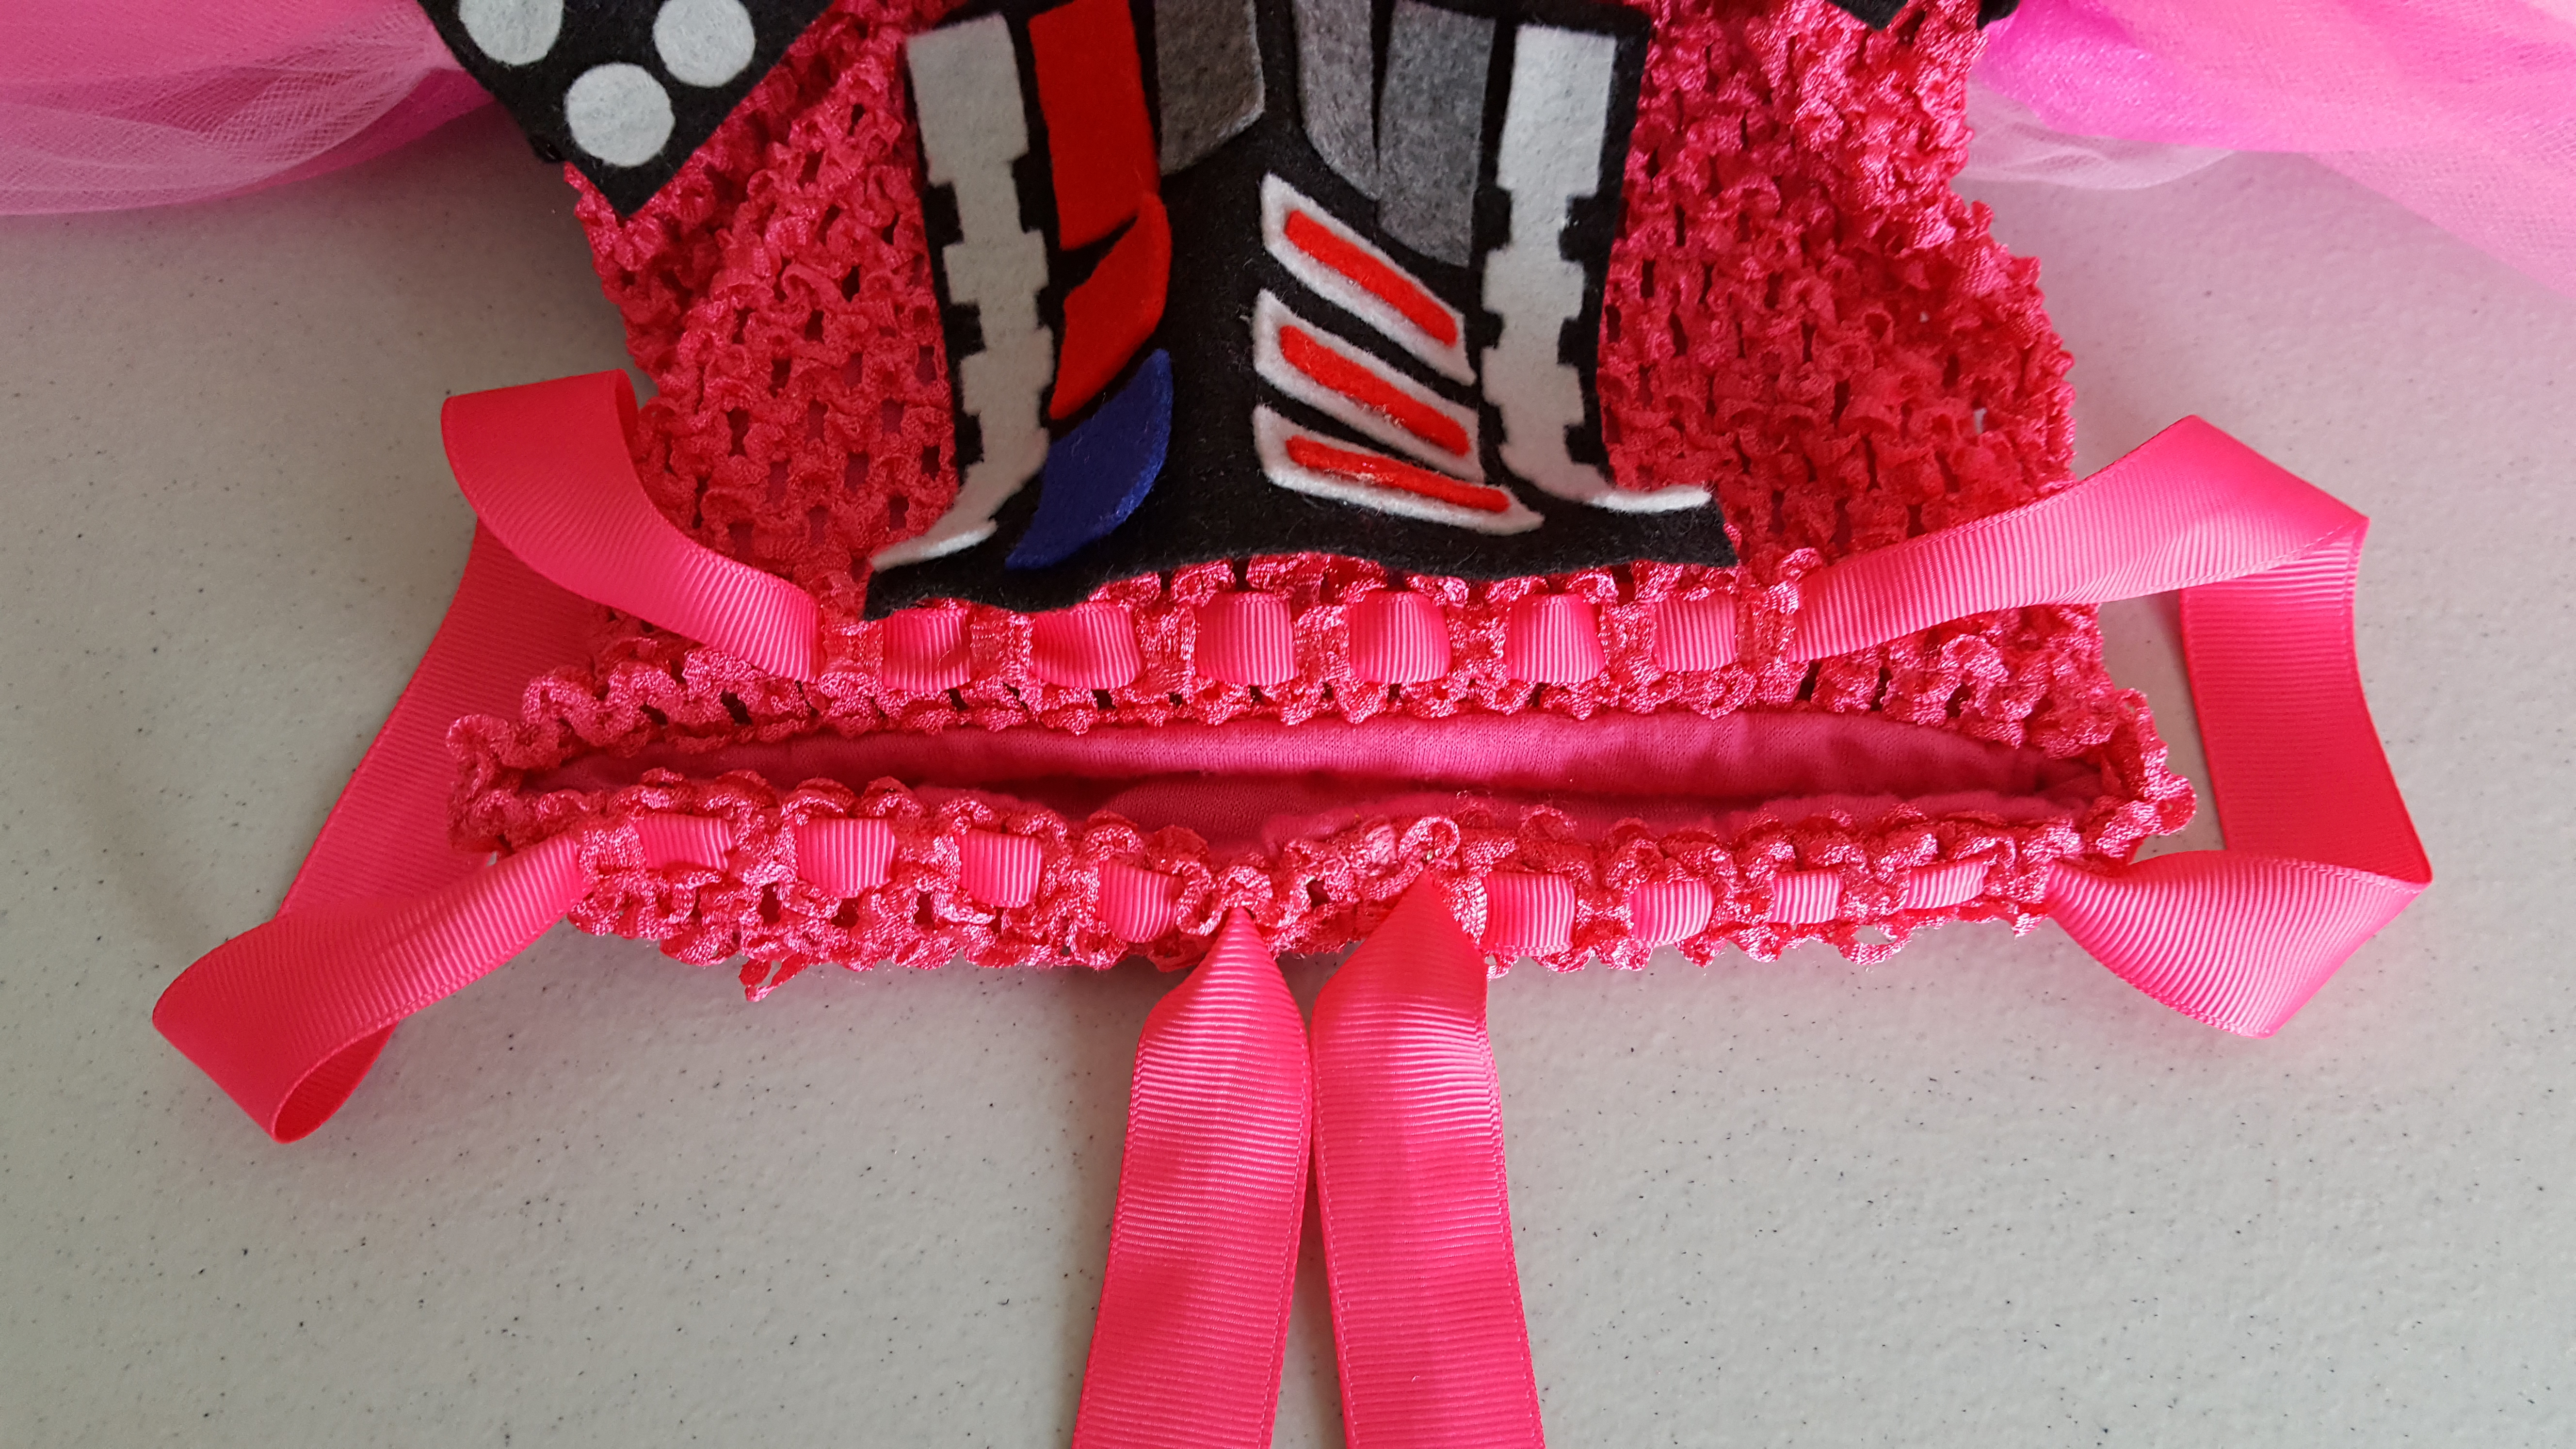
Making the breast plate and belt decorations for this costume wasn’t very difficult. I cut everything out of felt and then used a hot glue gun to attach the small pieces to the large pieces. Then I hand sewed the large pieces onto the tutu top. The black piece for the breast plate is about 4.25” wide and 4” tall. The main belt piece is about 13” by 1” with the center piece about 3.25” by 1.5” and the two side pieces 2.5” by 2”. Cut out and arrange the small pieces until you are happy. (If you really want to get your geek on, search on the internet for the different breast plate patterns and pick the one from your favorite movie!) After you are happy with your arrangement, glue the small pieces onto the black pieces.
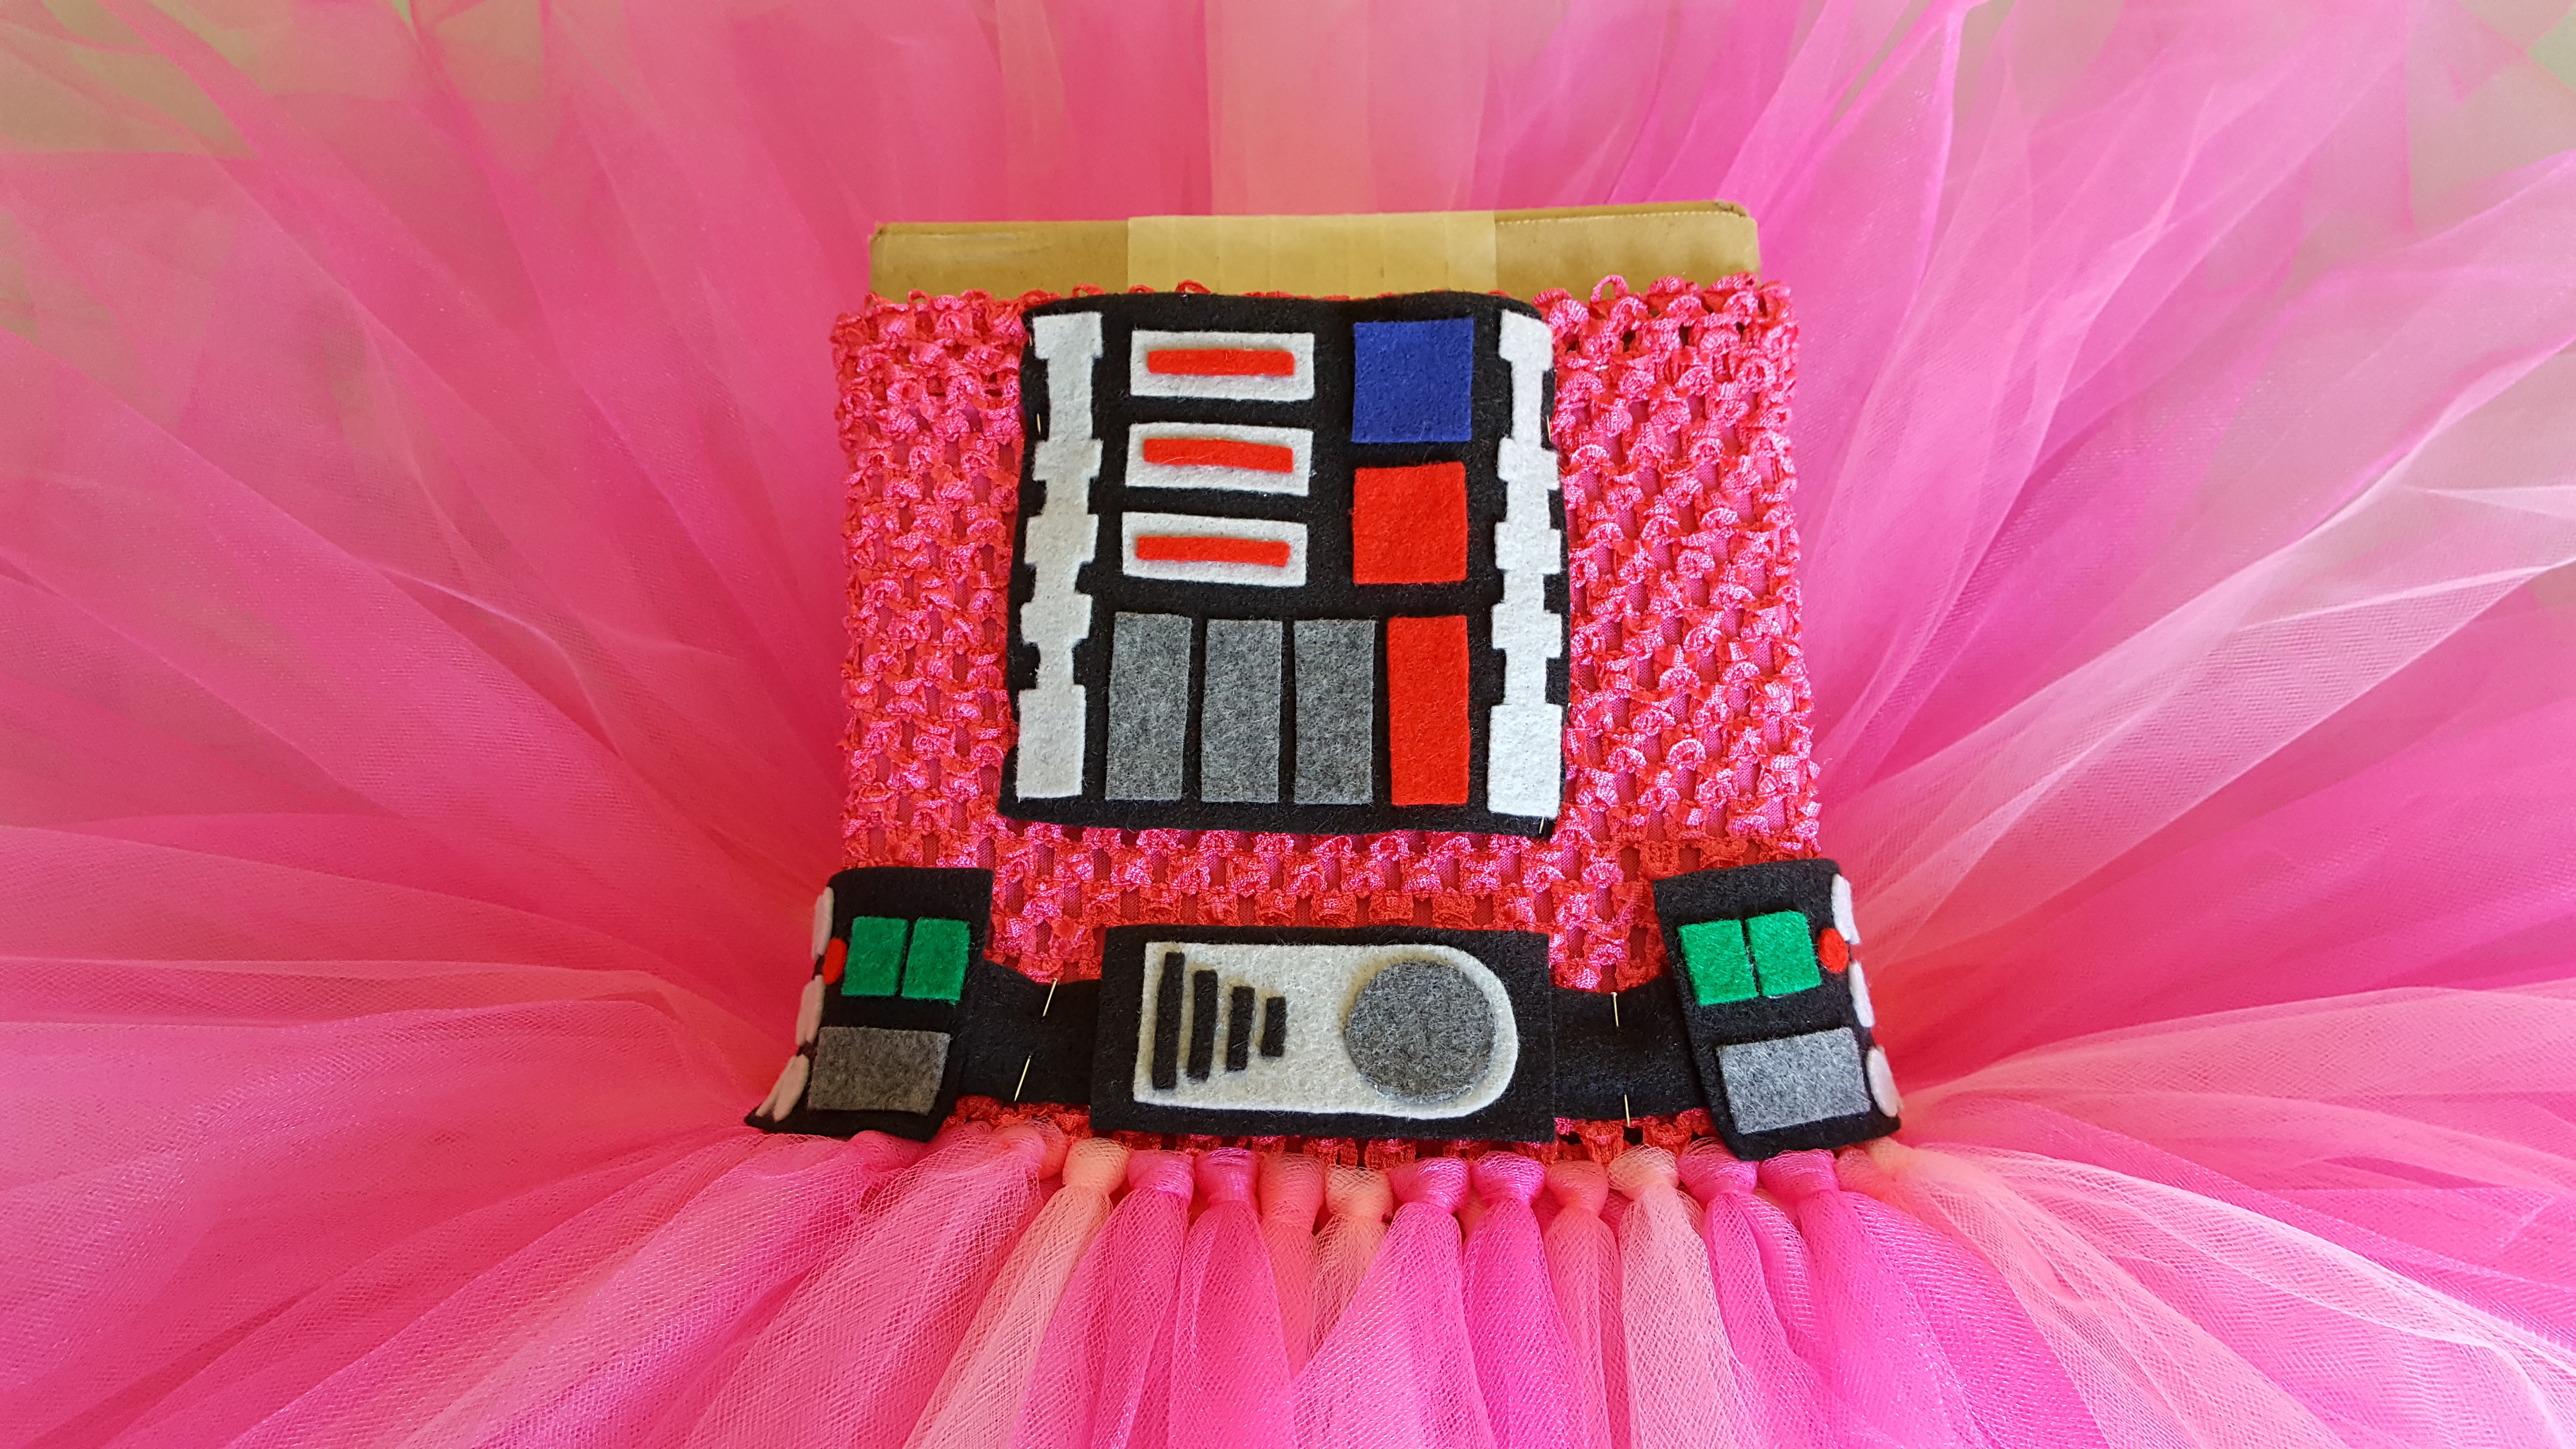
The trickiest part is sewing the pieces onto the tutu top. Pin the pieces to the tutu while it is stretched as wide as it will be while it is worn. If your princess is not available, you can use a box or a roll of paper towels as a dress form. For the breast plate I only sewed down the sides (not the top and bottom) to allow the tutu top to stretch. For the belt I sewed around the whole back piece. For both the breast plate and the belt I only sewed into the crocheted part of the tutu top, not the lining, and I sewed it very loosely so that the tutu top can stretch and come back to its resting position without tugging on the felt pieces.
The last step for the tutu is to add ribbon to the top for straps. I used a very long piece, about 86”, because I like the ribbon hanging long in the back. Weave the ribbon through the crocheted top across the front. Skip a section on each side for arm holes and weave each end half way across the back, leaving the ends loose so the straps can be tightened and adjusted each time it is worn.
This dress can be worn over a short sleeved or long sleeved shirt. My daughter loves pink on pink, but I think it looks pretty neat over a black shirt. Add a pink cape and all that’s left is the mask.
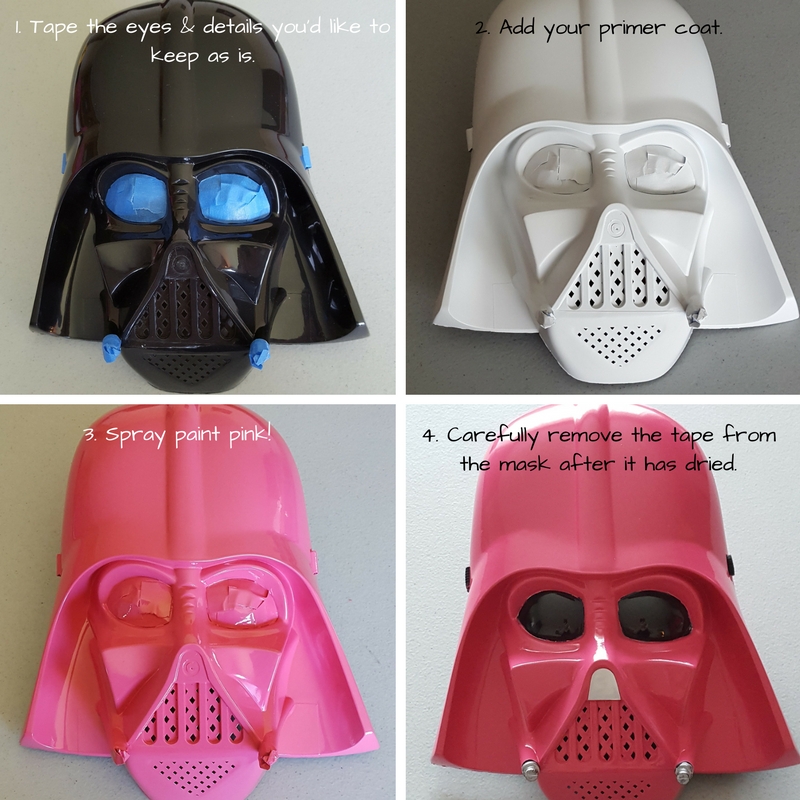
The trickiest part of turning your black Vader mask into a pink Vader mask is taping the parts that you don’t want to be pink, especially the eyes. I don’t have a great technique, I just kept adding small pieces so that the edges of the tape lined up nicely with the edges of the eye. I also taped the strap and the silver at the end of the pegs to keep that detail. The silver on the nose of the mask I bought was actually a sticker, so I removed it and put it back after I was done painting. I did a primer coat and then the pink coat, and then carefully removed all the tape. Follow the directions on the spray paint that you buy.
For the tiara I unwound the ribbon on the bottom, broke the plastic base so that it was the same width as the mask, cut the ribbon, and glued it to itself in the back. Then I used the hot glue gun to attach the tiara to the mask on both sides. If the center of the tiara touches the mask you can glue there as well, but if there is a natural gap I would recommend not gluing the center because it can return to its natural shape and pull the paint off of the mask.
If your child is anything like mine then she will definitely need a light saber to complete the costume. The pink is strong with this one! May the force be with you.
Be sure to pin this to your costume board on Pinterest (everyone has one of those, right?!) so you'll have Cheryl's great tutorial ready to go for when you're ready to craft. We're so excited to see all of your cute superheros and princesses! Share your pics with us on Facebook and Instagram (use #thehairbowcofan for a chance to be a featured fan on Instagram!). Few things make us happier than seeing all of the amazingly cute The Hair Bow Co. fans out there!!
Happy crafting, y'all!