

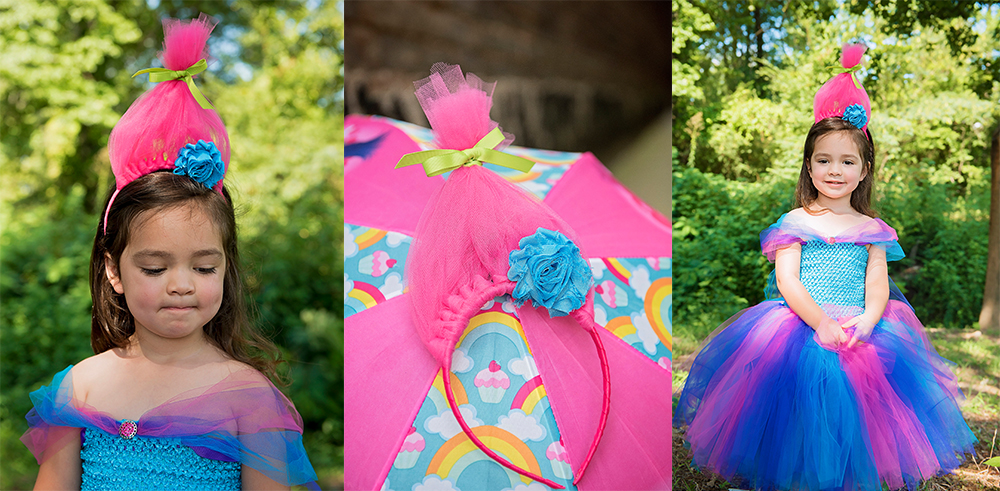
Cotton Candy Troll Hair Headband DIY
Posted by Guest Blogger Caitlin from An Enchanted Box on Aug 16th 2017
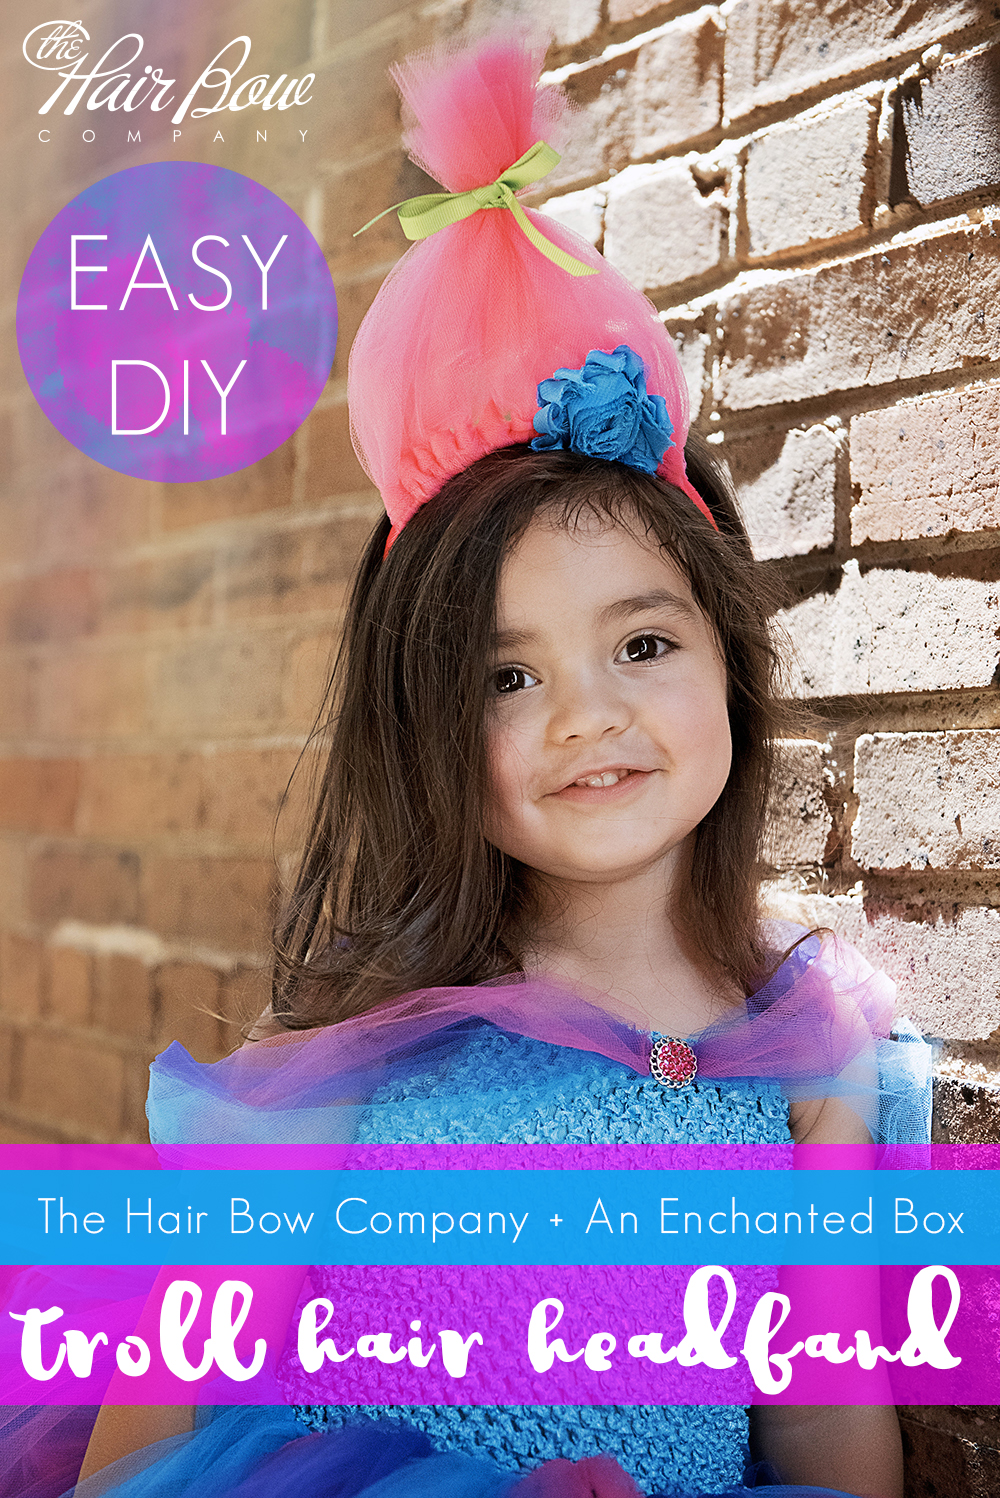
DIY Poppy Troll Hair Headband
We are so excited to welcome back guest blogger Caitlin of An Enchanted Box on Etsy, where you can find her charming tutus & tutu dresses, including darling dog tutus! Caitlin is guiding us through a whole series of Troll inspired DIY tutu projects, and this troll hair headband is the second. (You can find the Cotton Candy Troll Tutu Dress tutorial here!) The headband was created with The Hair Bow Company supplies below, but if you aren't a DIY'er yourself, you can find a selection of fun tutus and similar items available ready to go at An Enchanted Box!
Do you have a child who knows every word to the “Trolls” movie? Birthday party coming up? Desperate to find something to keep the kids occupied during the summer? Whether you’re looking for party favors or a super fun gift for children, this Troll headband will open up their world of make-believe! With these few supplies, all available from The Hair Bow Company, plus these easy directions, you’re ready to create troll wigs for anyone!
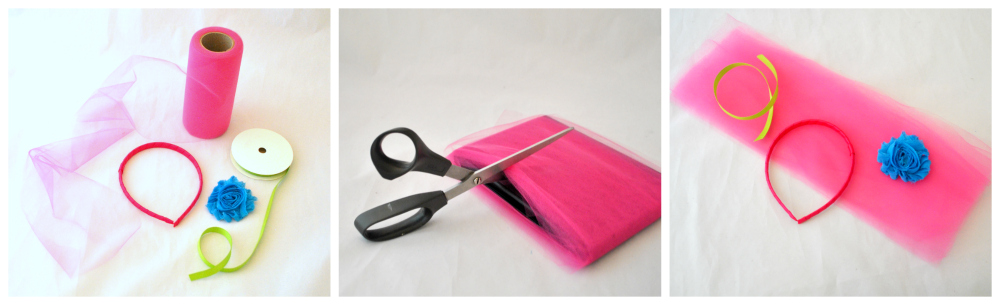
Wrapped Grosgrain Hard Headband:
Hot Pink
Tulle:
Hot Pink
Embellishments:
3/8” Apple Green Grosgrain Ribbon
Large Solid Shabby Flower in Turquoise
Additional Items:
Scissors
Hot Glue Gun and Glue
Recommended:
DVD Case
Sewing/Flexible Tape Measure
Fray Check or Lighter
Step One: Cutting the Tulle
The first step in making your Troll Headband is to cut the tulle! You will want approximately 12 – 18 strips that are each 15” in length. TIP: the standard DVD case is 7.5” tall which means it will take less time to cut your tulle if you just wind it around the case before cutting.
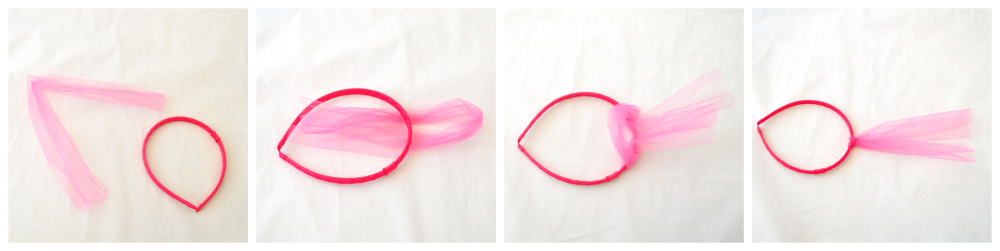
Step Two: Attaching the Tulle
Once you have cut the tulle, it’s time to attach it to the headband! You will be tying each strip individually to the headband using a basic Larks Head knot. Don’t be alarmed - it’s not a difficult knot. You’ve maybe even used it before in a key chain. All you do is take the tulle, bend it in half, thus making it 7.5” long, and lay the loop underneath the headband. Now, take the tails and pull them through the loop catching the headband in the middle. Viola! You’ve attached your first strand of troll hair for your wig! Now continue with the remaining strips until you’re about 4” away from either end.
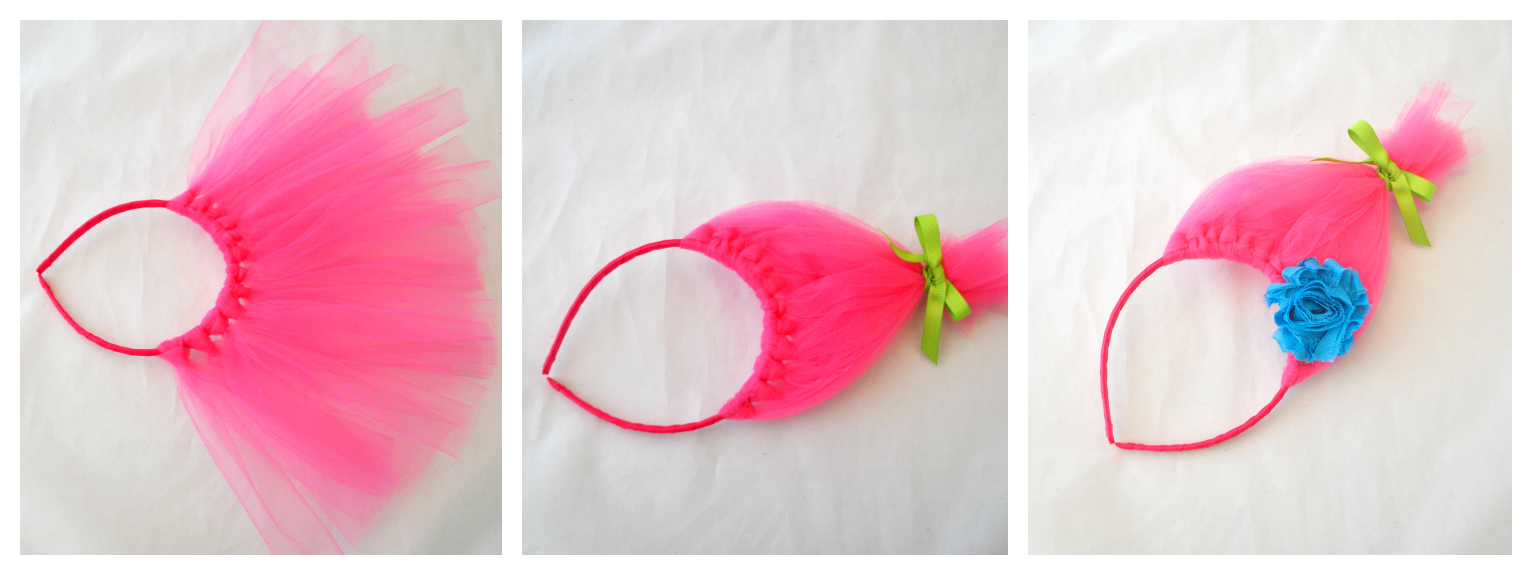
Step Three: Finishing Your Troll Headband!
To finish your headband, take your hot glue gun and apply a dab of glue to both knots on the end of your headband to ensure that they do not slide down. Next, cut your Apple Green Grosgrain Ribbon to a length of approximately 15” and seal the edges with either Fray Check or sear the edges quickly with the flame from a lighter. Do NOT use a candle as that will leave a soot mark on the ribbon. Gather up your Troll hair and tie it together with your ribbon. You may want to secure the knot with a touch of hot glue. Finally, glue on your Large Shabby Flower and, presto!, you’re finished! The great thing about these Troll Headbands is that there are endless combinations you can create with all the colors available through The Hair Bow Company’s headbands, ribbon, flowers and tulle. Have fun creating!
You’ll find this completed Troll Headband and more available on my store at www.etsy.com/shop/AnEnchantedBox
Resources:
Process photos, DIY & Crafting Expertise courtesy Caitlin of An Enchanted Box
Model Photography by Ava K Photography
You can find tulle here at The Hair Bow Company.
You can find wrapped headbands here at The Hair Bow Company.
Shop Caitlin's ready made tutu dresses and more here at An Enchanted Box.