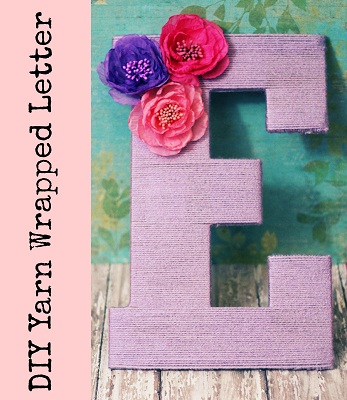
Embellished Yarn Wrapped Letter
Posted by The Hair Bow Co. on Apr 5th 2013
This contest is now closed. Congrats to Heidi who won this for her daughter Eden!
We have a fun tutorial for you today. These lovely yarn wrapped letters are the perfect addition to a nursery, kid's room, or even your mantle. Just choose a color combination that fits into your decor, and you'll love the look!
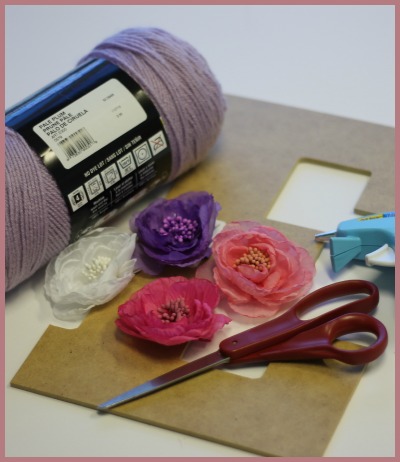
Gather your supplies. For this project you will need a wood or cardboard letter, yarn, scissors, glue, and embellishments.
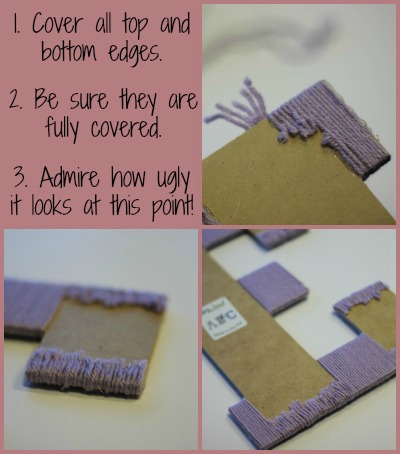
The steps will vary slightly based on what letter you're covering. I wanted my yarn to be wrapped horizontally, so I needed to be sure all the top and bottom edges were covered. It doesn't have to be super smooth and perfect, it will hardly be seen when your project is complete. In fact, it might look a little weird when you're done with this step. If you're like me, you will be saying, "This better turn out cute! It's not looking good right now and I'm about to be REALLY annoyed."
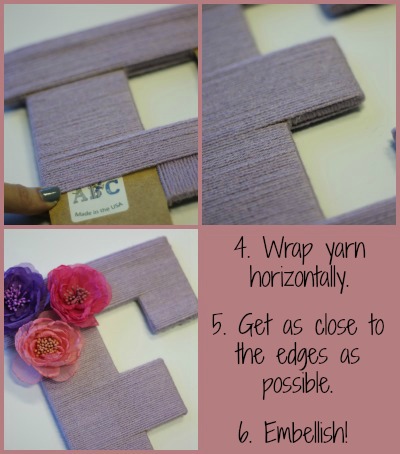
Once the top and bottom edges are covered, begin the horizontal wrapping. Get as close to the edges as you can without overlapping any of the yarn. Throughout the wrapping process, be sure to add a few dabs of glue to the back so that it stays in place. You'll especially need to glue around the edges so that the yarn doesn't pop off of the end of your letter.
When you have your letter all beautifully wrapped, it's time to embellish! I played around with several Vintage Blossom Flower Clips until I got a look that I liked. I think this color combination is so sweet and would look perfect in a little nursery! In fact, if you have a daughter with an E name, leave a comment and I'll randomly choose one of you to send this to!
I hope you like this! I certainly do. In fact, I may do a similar one with twine or thin rope for my son's room.