

DIY Glitter Frame
Posted by The Hair Bow Co. on Jan 16th 2013
There are two types of people in this world. Glitter lovers and glitter haters.
If you live with the "when in doubt, throw a little glitter on it" mentality, this is for you!
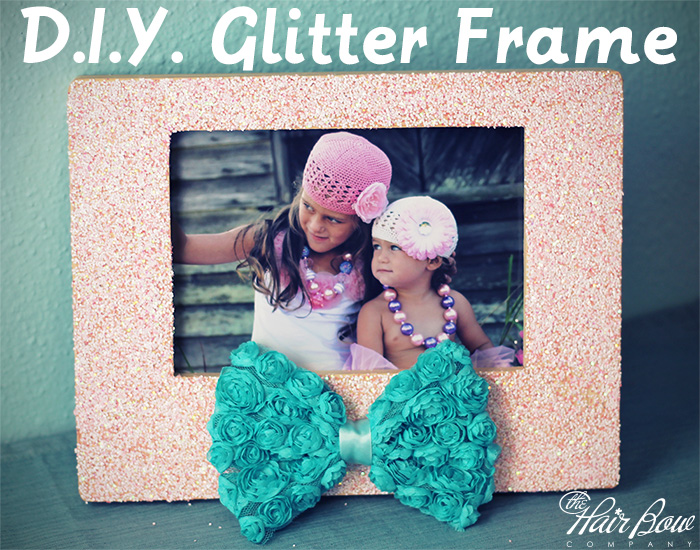
Glitter doesn't tend to photograph well, so please trust me when I tell you that this frame is gorgeously blingy!
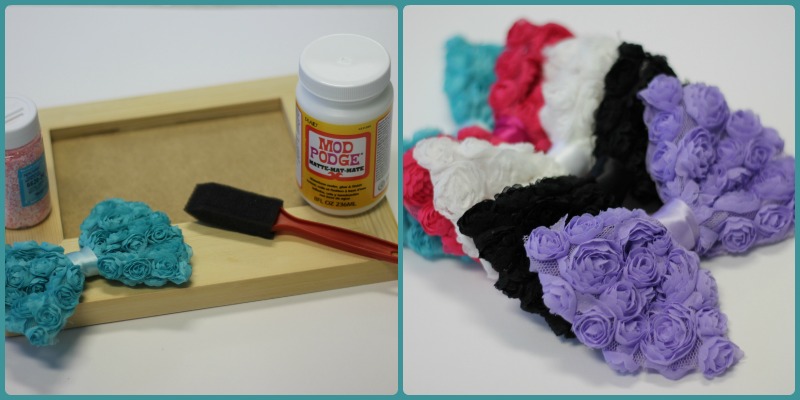
What you need: A frame, Mod Podge, glitter, embellishments.
I found an inexpensive, unfinished wooden frame at my local craft store, but I think this would work just fine with any frame you have. If it's really glossy, you may want to scuff it up with some sandpaper to be sure your glitter sticks.
For the embelishment, I wanted to use one of our new Shabby Bows. These bows are absolutely gorgeous and I thought they'd make a lovely frame for a nursery. We have quite a few color options (even more than pictured below!) but I opted for the aqua.
The instructions for this frame are simple but messy! You'll need to put something down so your house doesn't catch the glitter virus and sparkle for weeks. I used a big box since we have plenty of them and it seemed like the most effective way to contain my mess.
Lay your frame down in the box. Get your glitter unscrewed and ready, you'll need to be quick. Brush a good coat of Mod Podge all over the entire front of the frame. As soon as it is covered, sprinkle glitter all over it. Be generous, you won't want empty spots.
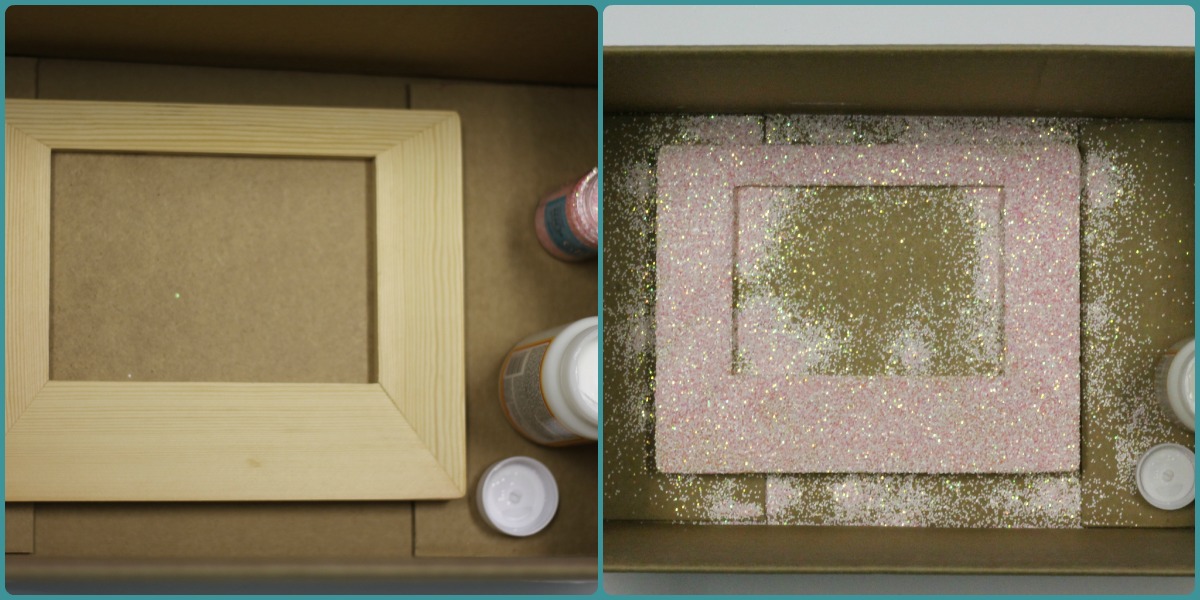
Let your frame dry before picking it up. I left the sides unfinished because I liked the look of it that way, but you can repeat the Mod Podge/glitter process on each of the four sides if you want.
Then just attach your bow! Just a nice glob of hot glue will do the trick! Gorgeous!

See all Hair bows!